
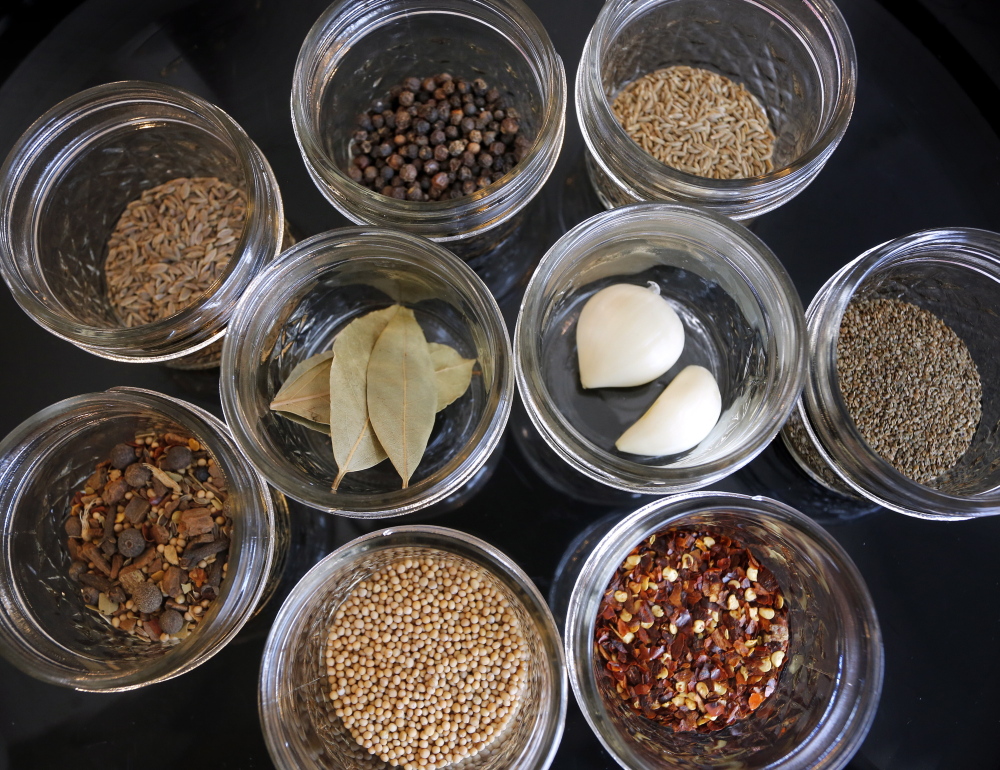
For homemade pickles with less effort, try quick refrigerator pickles – no canning required. Kathy Savoie, an educator with the University of Maine Cooperative Extension, demonstrates how. Choose your favorite spring vegetables and select the seasonings to suit yourself: celery, mustard, dill or cumin seeds; peppercorns; bay leaves; garlic; horseradish; fresh herbs – all work and produce an assortment of pickles. For detailed instructions from the Cooperative Extension, go to bit.ly/R4g1o4.
STEP 1: PREP THE VEGETABLES
You can use asparagus, spring-dug parsnips, ramps, sugar snaps or snowpeas, garlic, radishes, and carrots – alone or in combination. Ramps may require blanching. Trim the asparagus, snapping off the woody ends. Slice the radishes, carrots and parsnips. Use the pea pods whole. (Wash the veggies first – but you know that.)
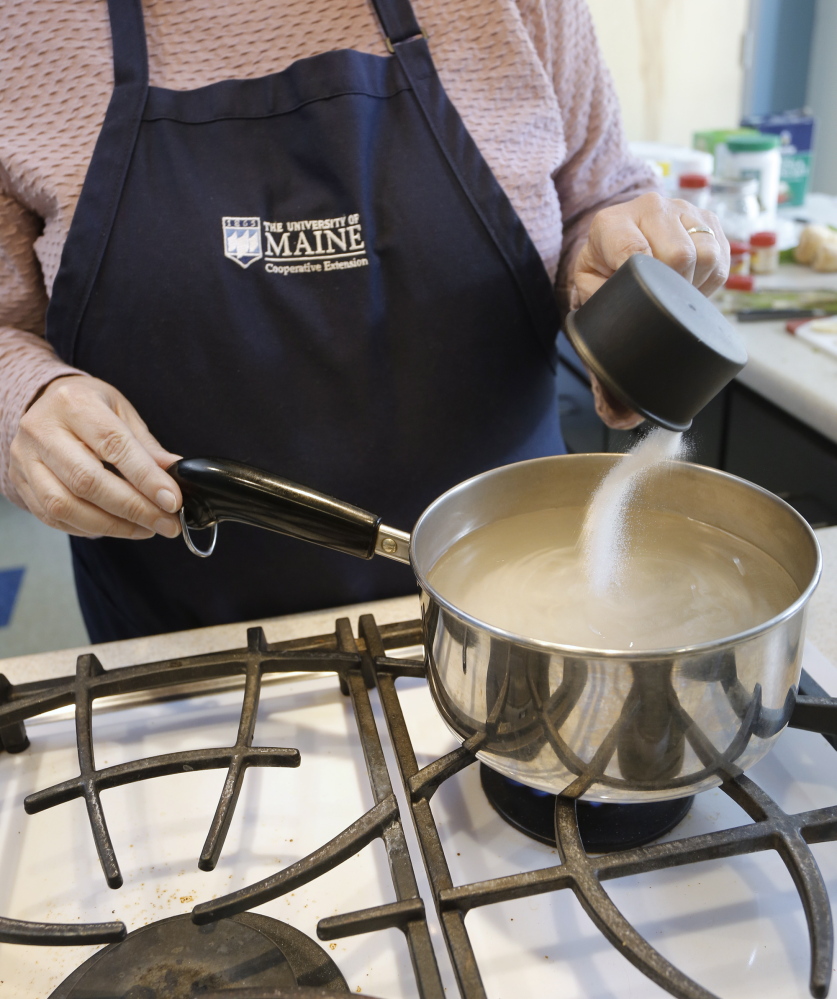
STEP 2: MAKE THE BRINE
To make enough for six pint-size jars, combine 3 cups white vinegar with 3 cups water, 2 tablespoons sugar and 3 tablespoons pickling (aka canning) salt in a saucepan. Boil the mixture on the stovetop for 2 minutes or so, until the sugar dissolves. To make a sweet brine, increase the sugar to 1 1/2 cups and decrease the salt to 2 tablespoons. Let the brine cool briefly.
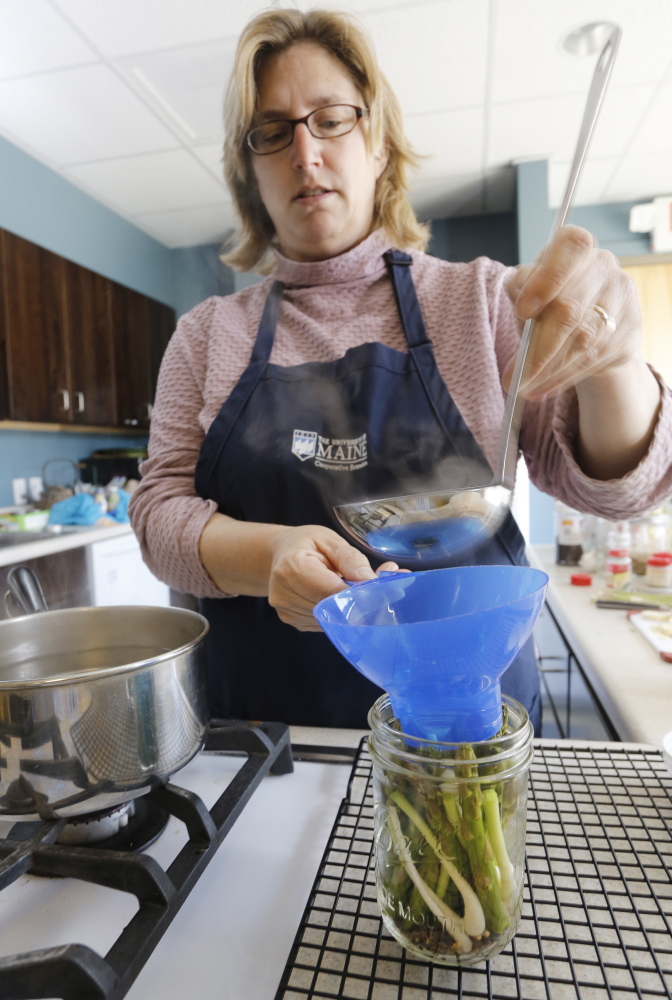
STEP 3: POUR THE BRINE INTO THE JARS
After letting the brine cool briefly, add the herbs and spices of your choice to the jars, then pack in the prepared vegetables. Pour in the cooled brine, leaving ½-inch head space.
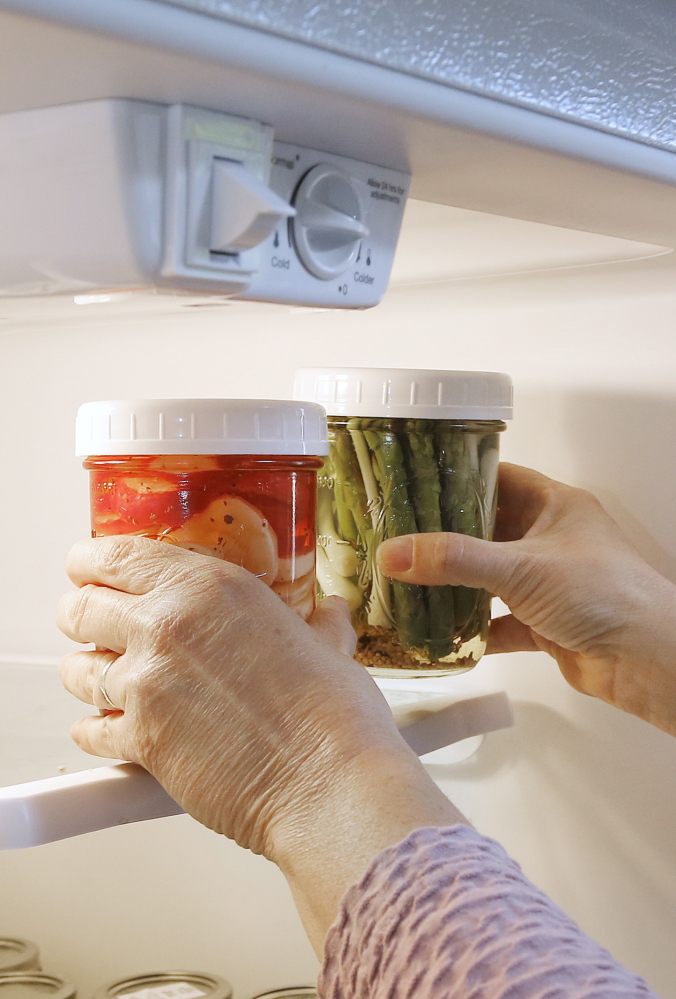
STEP 4: REFRIGERATE AND WAIT
Close the jars with plastic lids and refrigerate. Wait two days before eating the pickles to allow their flavor to develop. Keep refrigerated and eat within two weeks.

Comments are no longer available on this story