
Last week I was forced out of my sustainability-forward bubble for a minute or two. I asked Google to serve up information about what I thought would be environmentally driven challenges inspiring folks to reduce the amount of plastic wrap they use in their kitchens.
Turns out, a search on the phrase “plastic wrap challenge” produces links to hours of YouTube videos of couples taking The Saran Wrap Challenge. One person swaddles his or her partner from armpits to ankles in 100 layers of plastic wrap. The wrapper tracks the time it takes the wrapped to extricate him- or herself from these low-density polyethylene or polyvinylidene chloride cocoons. If you’re curious, the lapse ranges from 50 seconds to “I give up”.
Modern plastic wraps made for kitchen use are free from bisphenol A – the plastic ingredient with ties to several health concerns – and considered to be food safe. So the sweaty, challenged individuals were not in any chemical danger. But the piles of plastic lying on the floor at the end of each video were not repurposed in the kitchen. They were destined to reside in the landfill in perpetuity, because the vast majority of kitchen plastic wrap is neither recyclable nor biodegradable.
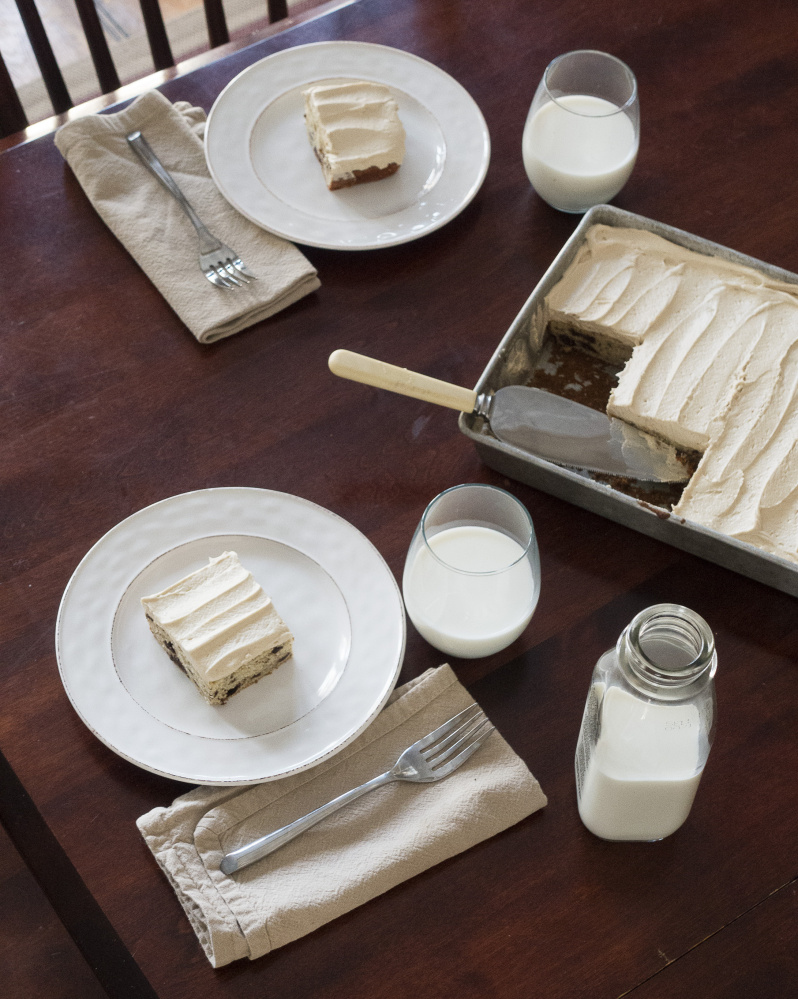
Banana Chocolate Chunk Cake with Peanut Butter Buttercream Staff photo by Carl D. Walsh
In light of this ecological folly, I’ve double downed on my efforts to not replace what I pledge to be my very last yellow and red box of Glad Cling Wrap in the drawer. Won’t you join me?
The first step to replacing anything with a more sustainable substitute is to embrace what attracts you to that thing in the first place. Plastic wrap provides a clear view of the food you’re attempting to keep fresh or freezer burn-free regardless of that food’s size or shape. That’s a pretty tall order, one unlikely to be filled by just a single item. Fortunately, a rotation of several tools will fit the bill.
Reusable glass jars work for liquids in volumes up to a quart. They provide a view of their contents and can be used for countertop, cabinet, refrigerator and freezer storage. If your leftovers are headed for the freezer, leave an inch of headroom so the substance can expand when frozen and not break the jar.
If you were married like I was in the early ’90s, you’ve likely got a set of glass-topped Pyrex bowls. These are also easy to find at thrift stores and flea markets and are the best option for when you’ve made double what you need for dinner because you planned for the leftovers. But they can be a clunky, oversized option for the last portion of broccoli.
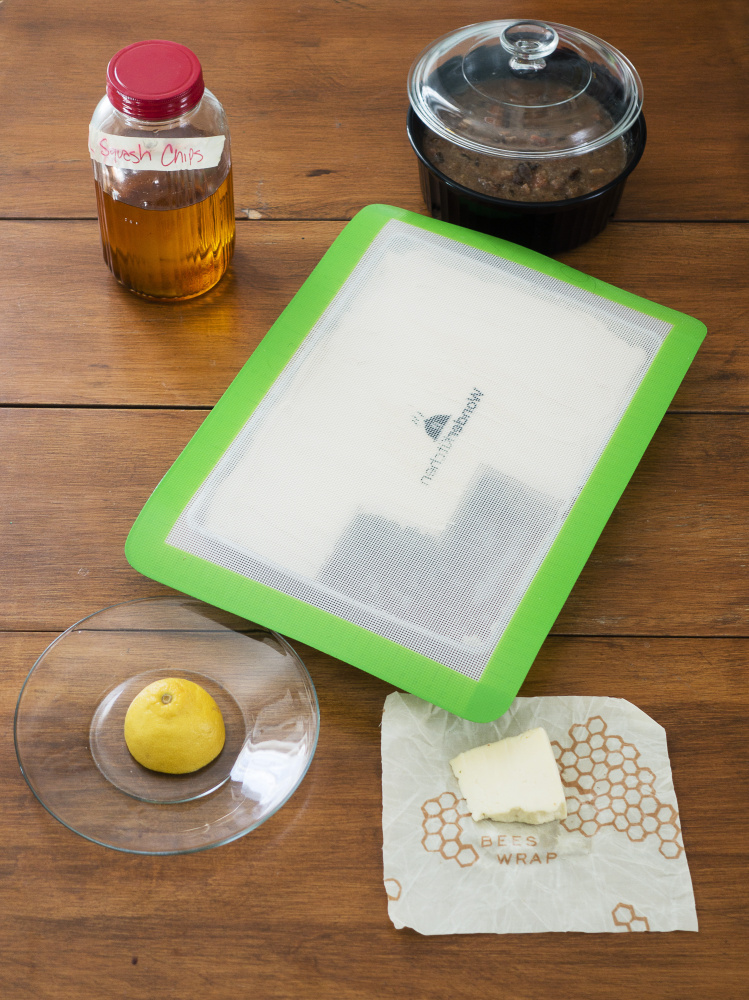
Christine Burns Rudalevige examines some alternates to plastic wrap for storing food, including, clockwise from upper left, mason jar, Pyrex covered bowl, silicone baking mat, beeswax-coated fabric and an open plate for certains types of food, such as a lemon, or other fruit with a skin. Staff photo by Carl D. Walsh
For smaller portions, you need something form fitting. My mother-in-law swears by silicone lilypad food-safe covers in all sizes that look like leaves and flowers, provide an airtight seal around smooth-rimmed bowls, and are microwave, oven and dishwasher safe. She stores them suctioned to her tiled backsplash, which makes me smile. Following her lead, I’ve used a silicone baking mat (already in the kitchen as a parchment paper replacement) to cover what I think is the hardest baked items to keep fresh from the first piece to the last without the use of plastic wrap: the sheet cake (see recipe). For round cakes, I keep a glass domed cake plate on my kitchen counter, and have a fabulous circa 1960s metal cake carrier handed down from my husband’s grandmother for when one needs to go mobile.
For oddly shaped produce requiring a close contoured fit (the half of the avocado you didn’t eat on toast, for example), I use beeswax-treated fabric. Companies like Abeego and Bee Wrap offer these or you can make them yourself by melting beeswax onto bits of cotton fabric in a very low oven. They form a seal around any food stuff using the warmth of your hands. You can wash them in cold, soapy water and reuse them, but they cannot be washed in hot water, so don’t use them for raw proteins.
Lastly, consider doing nothing. Many times a cut tomato, onion, lemon or apple will keep perfectly fine sitting cut side down on a plate until you’re ready to eat it up.
Christine Burns Rudalevige is a food writer, a recipe developer and tester and a cooking teacher in Brunswick. Contact her at: [email protected].
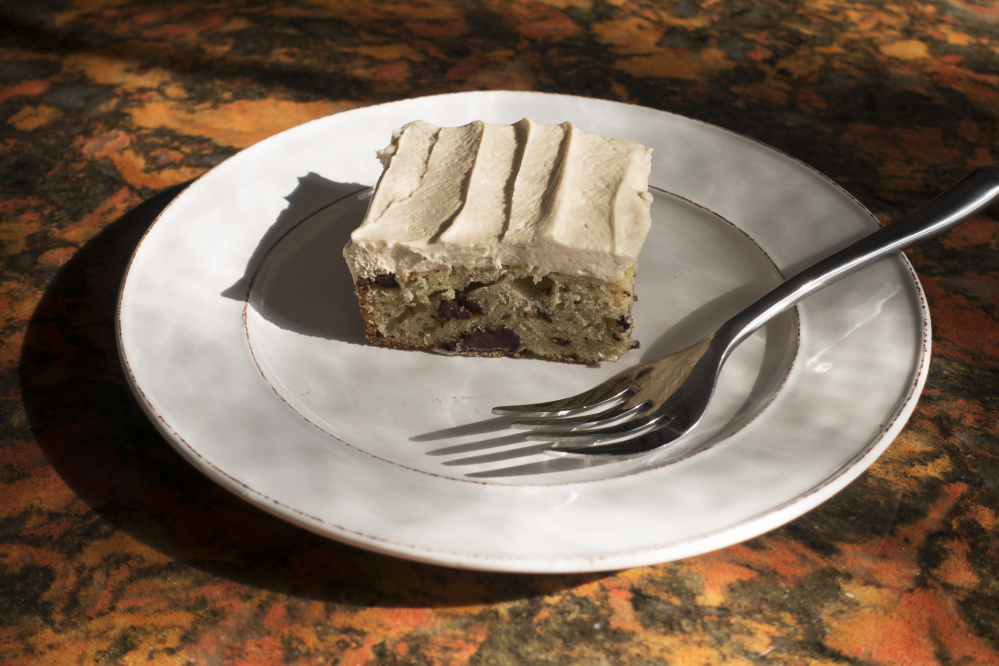
Banana Chocolate Chunk Cake with Peanut Butter Buttercream Staff photo by Carl D. Walsh
I could have provided any cake recipe that could be baked in a 13-x-9-inch pan to demonstrate how a silicone mat can be repurposed as a mechanism for keeping a cake fresh from the first piece to the last, but this one (adapted from a Nigella Lawson recipe) seemed a good use for the brown bananas I had in the freezer, the local buttermilk I had in the refrigerator and the bits of responsibly sourced chocolate sitting in the cupboard. The peanut butter frosting is an unnecessary, but highly recommended, bonus.
Serves 12
FOR THE CAKE:
12 tablespoons (11/2 sticks) unsalted butter at room temperature
1 cup sugar
3 large eggs
2 teaspoons vanilla extract
1 cup (2-3 medium) mashed very ripe bananas
2 cups all-purpose flour
1 teaspoon baking powder
¼ teaspoon baking soda
¼ cup buttermilk
2 (3-ounce) dark chocolate bars, chopped
FOR THE FROSTING:
12 tablespoons (11/2 sticks) unsalted butter at room temperature
2/3 cup creamy natural peanut butter
2 cups confectioner’s sugar
1/3 cup half and half
Pinch salt
Preheat the oven to 350 degrees F. Use butter wrappers to grease the bottom and sides of a 13-x 9-inch cake pan.
To make the cake, use an electric mixer to beat together the butter and sugar until very soft, pale and fluffy. Beat in the eggs 1 at a time. Add the vanilla and combine. Add mashed bananas, which may make the batter look like it’s curdled. Add the flour, baking powder and baking soda. Add the buttermilk and mix until just smooth. Take care not to over mix the batter, which makes the texture of the cake tougher. Fold in chocolate chunks.
Pour the batter the prepared pan. Bake until a tester inserted into the middle of the cake comes out clean (except for melted chocolate), 28-32 minutes. Cool the cake completely in the pan.
To make the frosting, use an electric mixer to cream the butter and peanut butter for 2 minutes. Add confectioner’s sugar and use a very low speed to work it into the butters (or it’ll “frost” your kitchen). Scrape the sides of the bowl, add the half and half and salt. Use a low speed to combine and then beat on high until frosting is very light and fluffy, about 3 minutes. Frost the cooled cake. Store any leftovers by covering the pan with a silicone baking mat.
Comments are no longer available on this story